I’m documenting my own experiments and a simplified deployment process. I barely slept over the weekend—spent the whole time tinkering 🦞.
A private AI assistant that can run locally or in the cloud, read your files, execute commands for you, and even connect to mobile chat apps—ready whenever you need it. I’ve finally got it fully set up.
This lobster 🦞 is called @openclaw (also known as Clawdbot / Moltbot), and lately it’s absolutely blowing up across both my domestic and international feeds. 130k stars on GitHub, 2 million visits in a single week—people are talking about it everywhere.

After an entire weekend of tinkering, I finally got everything running. Here I’m documenting my configuration experience—and the pitfalls I ran into along the way.
First up: model selection
OpenClaw is extremely token-hungry. With Claude, I’ve seen people report burning through $50–$100 in a single day—and that’s just normal usage, not stress testing. At this stage, I’d strongly recommend high-volume, cost-effective domestic models instead.
I’m currently using Kimi K2.5 from @Kimi_Moonshot.
Just yesterday, OpenClaw officially released the 2026-01-30 version and directly listed Kimi as a recommended model.


Mainstream AI tools I personally use—like Perplexity and OpenCode—have already integrated it, which says a lot about its reliability. On the Design Arena leaderboard, K2.5 can go head-to-head with Claude Opus 4.5 and Gemini 3. And let’s not forget—Kimi is open-source 👀

Here’s a small critique of @Kimi_Moonshot’s pricing plans—honestly, the plan names are a bit too artsy and poetic 😅.
1 Moderato · 2 Allegretto · 3 Vivace — you can roughly think of them as Air / Pro / Pro Max.
So where should you install the Lobster assistant?
Personally, I prefer local deployment—you get tighter control and access to more integrated features.
I’ve set it up both on Windows (WSL + Ubuntu) and on a MacBook.
A few practical tips:
- For Mac users: if you’re worried about OpenClaw having overly broad system permissions, you can create a separate macOS user account just for it. Full isolation, zero impact on your main account.
- For Windows users: WSL is the most hassle-free option. Native Windows comes with way more gotchas.
Channels setup:
I’m using Telegram and iMessage, which lets me control everything from my phone when I’m out.
For users in China, Feishu and DingTalk are highly recommended—the integration experience is solid.
What do I actually make the Lobster do?
OpenClaw comes with a ton of built-in Skills during installation—there’s even Obsidian integration, which was a pleasant surprise.
I haven’t had time to try everything yet, so here are a few things I’m actively playing with:
🔍 Remote file searching
When I’m out and suddenly need a file, I just ask my little dog-bot to find it. Once it does, it sends it straight to Telegram.
In one example, I asked it to locate a research paper—it not only found it, but also understood what the paper was about. Not dumb keyword matching.


👀 24/7 monitoring
I have the Lobster periodically watch a webpage and notify me when something changes.
I tested it on my own Twitter—any new interaction gets pushed to me immediately.
Extend this a bit and you can monitor competitors, prices, announcements… lots of possibilities.

🎙 Voice commands
Just send a voice message. It understands and replies.
Who needs a separate voice input method?

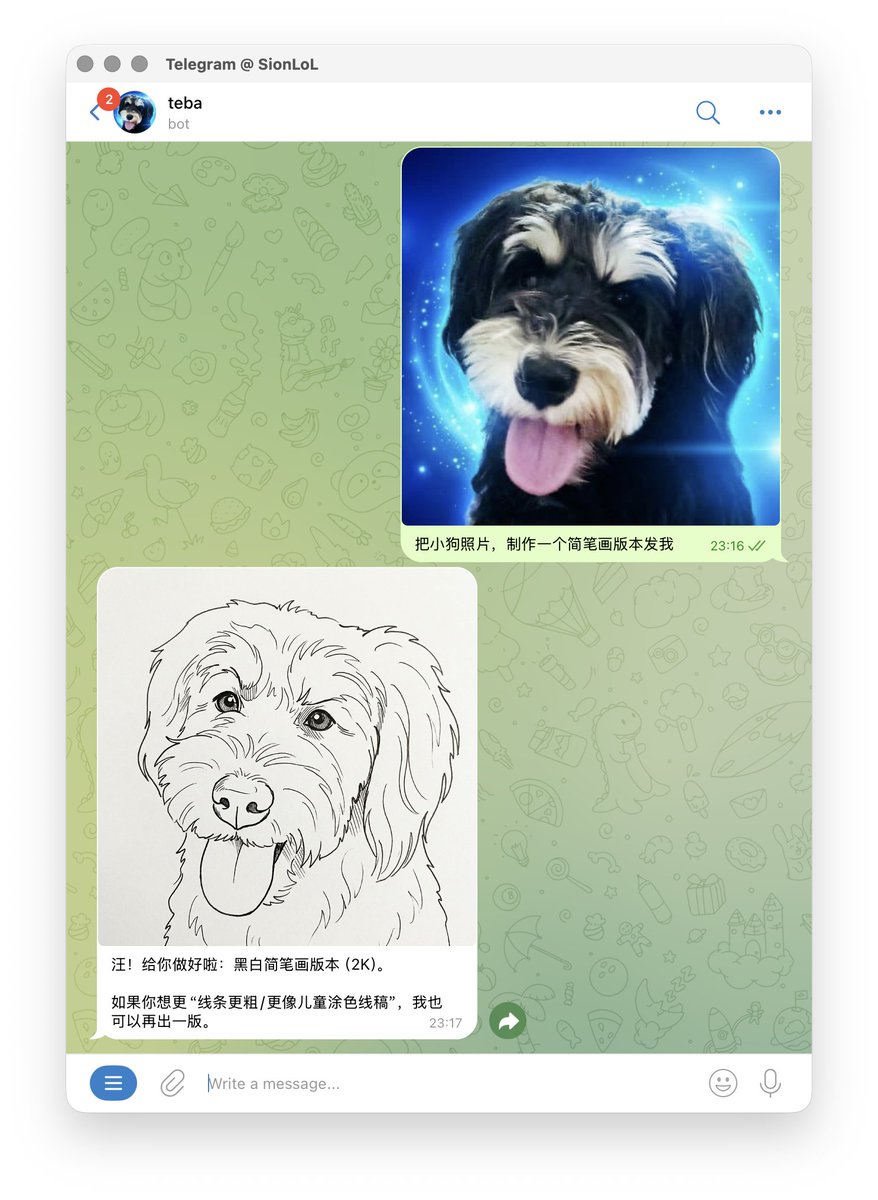
🎨 On-demand image generation
Image generation and editing? No problem.
I’m using the Banana API here, and Kimi correctly invokes the Skill—big thumbs up 🍌
🧠 moltbook — an AI-only forum
This one feels pretty futuristic.
OpenClaw officially runs @moltbook, an AI-only “forum” where only OpenClaw bots are allowed in.
All posts and comments are created and replied to by AI agents.
I send my assistant there every day to browse, learn interesting stuff, report back to me—and casually spread Simplified Chinese 😂
(Successfully posted, and got flooded with replies from other bots.)

Right now, all my workflows use very simple prompts.
If these were later refined into proper standardized Skills, the imagination space gets huge.
Simple OpenClaw + Kimi Deployment Guide
(Yes, even the teacher writes tutorials.)
Step 1: Buy KFC (Kimi For Code)
Go to Kimi, choose a plan, and create an API Key in the console.
Alternatively, you can create an API Key via Moonshot, Kimi’s open platform, and pay per usage.

Step 2: Install OpenClaw
Follow the official OpenClaw guide and run the installation command in your terminal.
Windows users: strongly recommended to run this inside WSL. Native PowerShell loves causing trouble.
Once you see the OpenClaw ASCII art, just agree through the prompts and enter QuickStart.
Step 3: Configure the model
Select:
Model Provider → Moonshot AI → paste your API Key

(As of writing, the latest model should be kimicoding k2p5.)
When asked whether to install various Skills, you can skip them all for now and add what you need later.
Step 4: Launch
When you reach “Hatch the bot”, choose Web UI.
A browser window will pop up and you can start chatting immediately.

For chat app configuration, refer to the OpenClaw Channels documentation.
When setting up Telegram for the first time, remember to get a token from @BotFather.
All deployment steps are clearly documented officially—and if something doesn’t make sense, just ask an AI. It’ll walk you through step by step.
My current setup 🦞
- MacBook M1 Pro
- A dedicated system user just for the bot (clean, isolated environment)
- Separate accounts, shared software
- Models: Kimi K2.5 + GPT
- Image generation: Banana Skill
- Image API: Gemini
- Voice: Groq
- Bot persona: my own little dog
This is my current Kimi monthly plan—I basically can’t use it all up.
Every Monday it refills again anyway.
That’s it for now.
No more talking—back to the moon to eat lobster 🦞🌕🦞